Thursday, 23 February 2012
While reading about making the ND filter i saw instructions on making an Infrared filter for your camera. The ND filter used a piece of welding glass to "dim down" the amount of light that enters the camera. With a IR filter you need something that only allows infrared light to enter the camera. I had an old camera that i never use because the lens is kind of scratched, so it was perfect to try this out with.
The infrared wavelength is just longer than is visible to the human eye. In fact visible light is only a small part of the light spectrum.
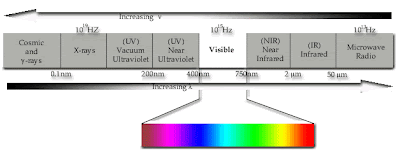
Far infrared is used in thermal imaging cameras. Heat given off by objects is in the far infrared spectrum of light.

The pictures i would be taking would not show this kind of thermal imaging, just the light from the Near Infrared.
Simply put, i wanted to remove the piece of glass that blocks infrared light, then add exposed film which ONLY allows infrared light into the camera.
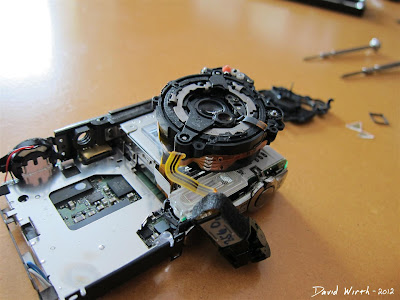
First, the hard part. Camera's have a tiny piece of glass between the lens and the sensor which blocks infrared light from passing through. I wasn't sure i would be able to remove it but i did. It's the broken pieces of red tinted glass at the bottom right.
And even more surprising is that i was able to put the camera back together the first time and it still worked.
Now that infrared light can pass to the camera's sensor i needed a way to block the visible light. Online there was a lot of different ways that people said this could be done but the cheapest and easiest way looked to use a piece of film negative and an old floppy disc.

And i tried part of an old floppy disc.

Here are the pieces from the exposed and unexposed processed film.

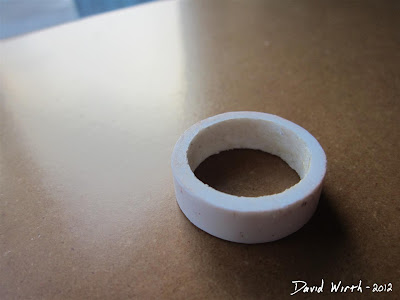
I was planning on mounting the film on a PVC filter like i had done before. In hindsight that probably would have been a good idea. So i started to making a fitting out of PVC like before. But then i saw that the best way to do it was to cut the film and glue it in place INSIDE of the camera, right in front of the sensor. So i ended up not using this.
But before i did that i needed to know what is the best material to use. I decided to experiment with all of the ways people suggested to block the visible light. Here were the 3 pieces that i would be testing.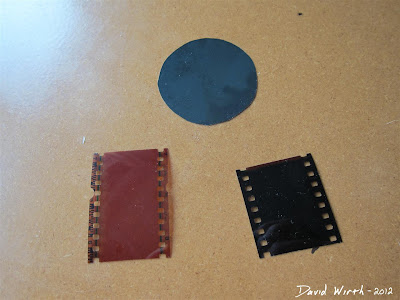
The material and the results from the test: (click images to enlarge)
1. Film negative that had been exposed to light

2. Film negative that had not been exposed to light
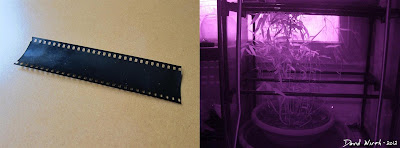
3. Floppy disc
The floppy disc over the lens made the picture come out so dark that it wasn't usable. I could have left the shutter open for a much longer time, similar to the ND filter, but i decided just not to use it. So i moved on to layering two pieces of material together.
5. Two pieces of film negative that had been exposed to light
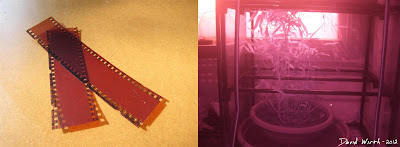
6. 2 pieces of film negative that had not been exposed to light
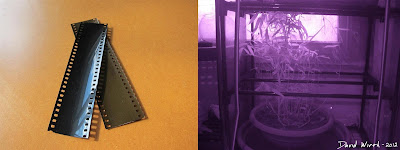
7. 1 piece of exposed and 1 piece of unexposed film negative
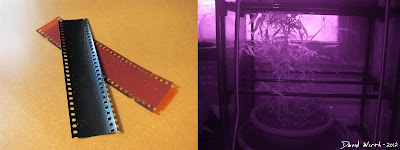
It turned out that the best result was the last one i tested, 1 piece of exposed and 1 piece of unexposed film negative.
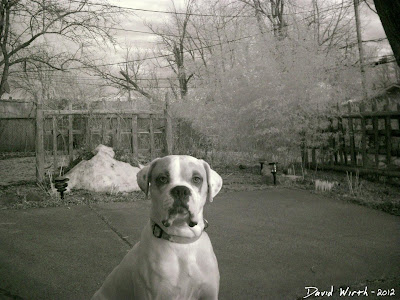
I took a couple of pictures in the backyard and liked how they came out. This picture is the original, right out of the camera.

This is after adjusting the colors in Photoshop.
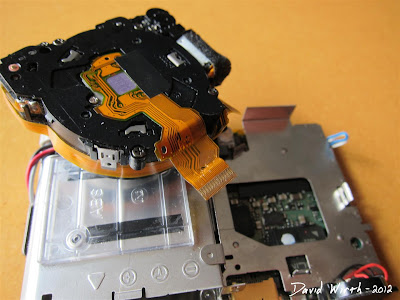
Now here's the bad part. When i finally decided what to use i took the camera apart again and glued in the 2 pieces over the sensor.


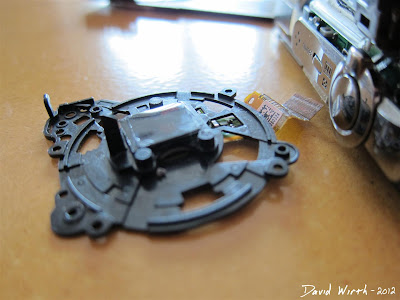
Then when trying to put the camera back for the 4th time i damaged the small ribbon cable from the lens to the circuit board. You can kind of see the tiny hole in the orange cable.
It's a bit of a bummer, not that i would have used this camera a lot but it would have been fun to experiment with.
The infrared wavelength is just longer than is visible to the human eye. In fact visible light is only a small part of the light spectrum.

Far infrared is used in thermal imaging cameras. Heat given off by objects is in the far infrared spectrum of light.

The pictures i would be taking would not show this kind of thermal imaging, just the light from the Near Infrared.
Simply put, i wanted to remove the piece of glass that blocks infrared light, then add exposed film which ONLY allows infrared light into the camera.
First, the hard part. Camera's have a tiny piece of glass between the lens and the sensor which blocks infrared light from passing through. I wasn't sure i would be able to remove it but i did. It's the broken pieces of red tinted glass at the bottom right.

And even more surprising is that i was able to put the camera back together the first time and it still worked.

Now that infrared light can pass to the camera's sensor i needed a way to block the visible light. Online there was a lot of different ways that people said this could be done but the cheapest and easiest way looked to use a piece of film negative and an old floppy disc.

And i tried part of an old floppy disc.

Here are the pieces from the exposed and unexposed processed film.

I was planning on mounting the film on a PVC filter like i had done before. In hindsight that probably would have been a good idea. So i started to making a fitting out of PVC like before. But then i saw that the best way to do it was to cut the film and glue it in place INSIDE of the camera, right in front of the sensor. So i ended up not using this.

But before i did that i needed to know what is the best material to use. I decided to experiment with all of the ways people suggested to block the visible light. Here were the 3 pieces that i would be testing.

The material and the results from the test: (click images to enlarge)
1. Film negative that had been exposed to light

2. Film negative that had not been exposed to light

3. Floppy disc
The floppy disc over the lens made the picture come out so dark that it wasn't usable. I could have left the shutter open for a much longer time, similar to the ND filter, but i decided just not to use it. So i moved on to layering two pieces of material together.
5. Two pieces of film negative that had been exposed to light

6. 2 pieces of film negative that had not been exposed to light

7. 1 piece of exposed and 1 piece of unexposed film negative

It turned out that the best result was the last one i tested, 1 piece of exposed and 1 piece of unexposed film negative.
I took a couple of pictures in the backyard and liked how they came out. This picture is the original, right out of the camera.

This is after adjusting the colors in Photoshop.

Now here's the bad part. When i finally decided what to use i took the camera apart again and glued in the 2 pieces over the sensor.


Then when trying to put the camera back for the 4th time i damaged the small ribbon cable from the lens to the circuit board. You can kind of see the tiny hole in the orange cable.

It's a bit of a bummer, not that i would have used this camera a lot but it would have been fun to experiment with.


 Home
Home