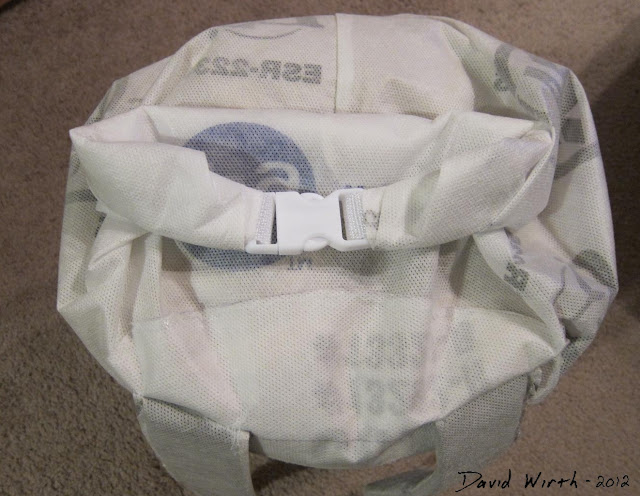
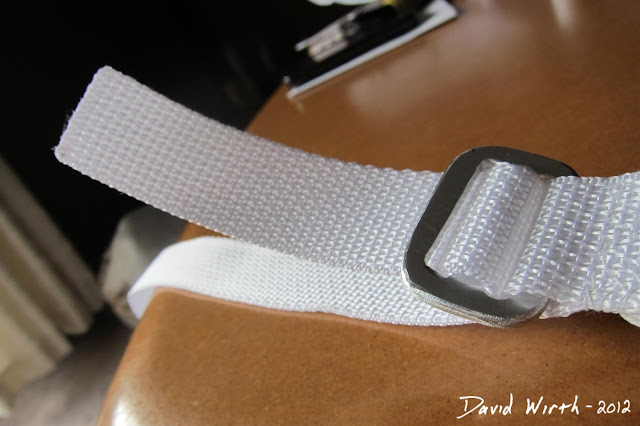
It's called the Hyperlite Mountain Gear Metro Pack and cost $128. It's appeal is in that it's light weight, has a large carrying capacity and is waterproof. So i looked at all the pictures and decided that it wouldn't be too hard to make.
The best part is that i knew exactly what material they used, Tyvek. About a year ago i bought a 36" x 150' roll of NovaWrap Tyvek material. I used it to make a Parafoil Kite and as a waterproof barrier for my Backyard Pond. It has tons of uses and it's great to have a roll sitting around.
Tyvek is great for several reasons:
- cheap
- light weight
- waterproof yet breathable
But i decided that the best way to make the backpack was to sew the pieces together. I used a heavy cross stitch with nylon thread to make sure the seams didn't split apart. Although i did use several small pieces of the clear packaging tape to hold the Tyvek together while i was sewing.
I started like i always do, with lots of drawings. Here's one of the many sheets i drew up, with ideas and materials i thought about using. I was trying to work out what buckles to use, if i wanted a waist strap or chest strap and how to attach the straps to the bag.
I decided that the goal of the backpack was to be small, lightweight and compact. Therefore i opted not to add a waist strap or chest strap.
I forgot to take pictures at the start of the project. But the main part of the bag itself was made with the full 36" wide tyvek material folded over on itself, sort of like a tube. I'm not sure how tall i made it, i just kind of eyeballed where i wanted it to sit on my back and how high it would be at my shoulders. (taking into account that the top 6" or so would be rolled up and buckled) But here's what it looked like after i cut the main pieces out and sewed some of them together
This is what the bottom of the bag looked like. It's basically just like wrapping a Christmas present. I sewed along the entire seam, then folded it over to the center on both sides. Then i sewed again along each edge of the fold. It all made for a very strong joint, which is good because the bottom of the bag is where all of the weight of the bag will be focused. The other nice thing was that it made a flat bottom of the bag.
For the shoulder straps i was originally just going to cut some off of an old backpack of mine. But i decided to try and make shoulder straps of my own. And i have to say that i'm glad i did, it wasn't really that hard. Luckily i had some 1/2" foam in the basement, which i used as the core of the shoulder straps.
I used one of the shoulder straps from my old backpacks as a template. I layed it on the Tyvek and traced out the shape. I had to cut out 4 pieces from that pattern, front and back for each strap. The hardest part was sewing the final edge and making sure the foam was pushed in tightly.
Referring back to some of the pictures at the original Hyperlite Mountain Gear Metro Pack i knew that i needed an additional piece of Tyvek for support to attach the backpack straps. If i just sewed the shoulder straps to the single layer of Tyvek it might rip under heavy weight.
Here it is just before sewing the straps on. To make sure they were on securely, i sewed back and forth about 5 times, or until the needle jammed.
At this point it looked pretty good, but i still had some tricky bits left.
I really liked how simple the top of the original bag was secured. All it needed was a buckle sewn at either side near the top.
You can see from the first two pictures that the top is rolled up and then these buckles pull in and clip to each other.
No need for straps or ties, this simple and strong method works great.
The last step i had to figure out was how i was going to make the straps and buckles, which attach the shoulder straps to the backpack. Here are the buckles on two of the backpacks i have. They are made of pretty strong plastic, they have three slots for the straps to loop through.
I decided not to "reinvent the wheel" but i didn't like the original design. I thought that i could make it work with just one cross bar instead of two. It would be stronger but it meant that two straps would have to go through the same slot.
I couldn't decide what material to use so i made both. The two buckles on the left are made out of thick Lexan. (Plexiglass) The two on the right are made out of aluminum. I really liked the plexiglass, it was easy to work with and looked good. But ultimately i decided to use aluminum. It was only a tiny bit heavier then the plexiglass but a lot stronger.
I did round off the four corners and smooth the edges, since my arms would be swaying as i walked and most likely brushing against the buckles. I used a couple different metal files/rasps and finished with 220 grit sand paper.
Next i looped the straps through and sewed them by hand.
As you can see these are what transfer the weight from the shoulder straps to the aluminum buckles. The reason why i made those two little humps with the straps is still a mystery to me. It's like that on all of my backpacks. I know that it's suppose to be a place where you can attach things like a compass or water bottle, but i've never actually used them. Ultimately though i thought that it makes it more professional looking so i copied the design.
This is how the straps attach. You can kind of see that the slot on the right has two straps going through it. This is where i changed the design a bit. Normally the buckle has three slots for the three straps. But i think this is just as good, if not better.
I sewed the other end of the straps to the bottom of the bag by hand. Again i made sure that they were securely attached since they would be carying all of the weight.
And that's it, the backpack was done. It ended up taking just a few days to make. Mainly because i had to buy the white plastic buckles and i was designing the details as i went along. If i had to make another one from start to finish it would take about 4 hours. Cutting, drilling and filing the aluminum buckles did take some time though, so it might be a little longer.
Here i am wearing the backpack. I put my sleeping bag in the backpack, nothing heavy. It was fairly comfortable but i did notice the small bit of folding horizontally where the shoulder straps attach. I didn't think it was a big deal though. You can also see the seam i sewed running up the back.
Here it is from the side.
I had to keep reminding myself that whole point of this backpack is to be light weight and compact. It's not going to replace my big camping backpack. It doesn't need all the side pockets, waist straps, zippers and things.
This is what it looks like all folded up. It's super compact and would be a great thing to put in your trunk or to take with you as a spare bag on a trip.
I haven't tested it yet, but it should be somewhat waterproof, probably more like water resistant. I mean if you fell in a river while wearing it i suspect that water will get in through the top and some of the seams. But if you wear it while it's raining i don't see why anything will get wet.
I may end up making some other bags, probably not backpacks though. Just simple, smaller bags with the same buckles at the top.


 Home
Home
+ comments + 1 comments
Can you show me a diagram of how you folded and sewed the bottom?
Post a Comment