That was just the first part of her new arts and crafts room. She wanted a place that she could sit and have everything she needed to be able to make different arts and craft projects at home.
Karrie just started making some small hair bows and she's trying to sell them on Etsy. Hopefully this would make it easier for her to make the bows and keep everything in order. You should check out her store and maybe by a couple of the handmade bows, she's selling them for just $6.
Here's her home page where she plans on having all of the different homemade bows she is selling:
https://www.etsy.com/shop/BowtiqueGlam
And here is the direct link to her first page where she has 2 different types of bows she is selling:
https://www.etsy.com/listing/169614173/hair-bows-for-the-glam-in-every-girl
So we looked online for a while until she found something that she liked. The first thing she saw and asked for was a simple work desk. It was made of three pieces, two bookshelves and a countertop.
I thought it was a great idea and a way to incorporate both a work area and storage. I liked it because of its simple design, combining form and function. She could put some of her supplies on the bookshelves below the table.
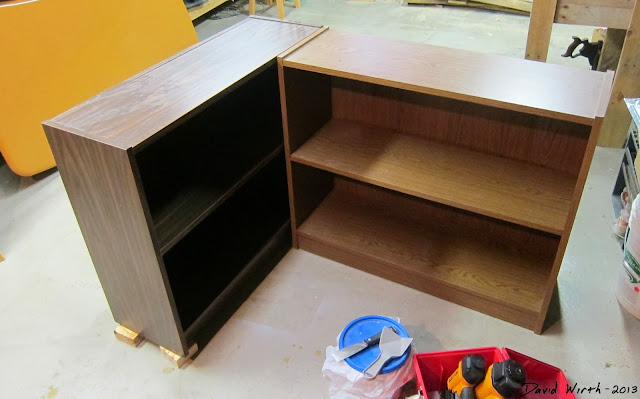
We already had 2 bookshelves from when my office got rid of some of their old furniture a year ago. We've had these two small bookshelves in the basement since then. They were both roughly the same size but one was slightly shorter than the other.
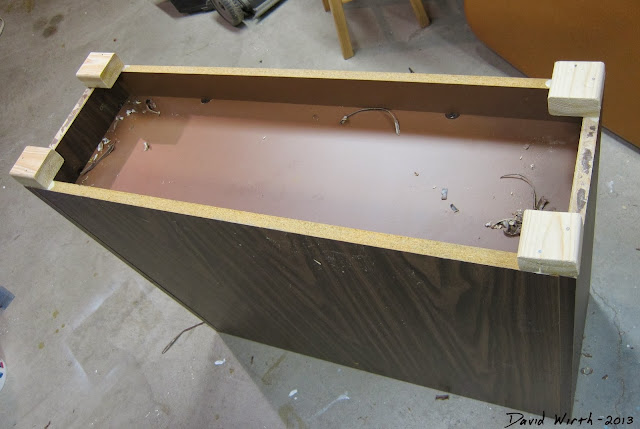
You can see that I had to add some 2x4 blocks as legs in order to raise the bookshelf to the same height as the other one. Real simple though, I just use some wood glue and nails. Obviously they need to be the same height so that the work surface is level.
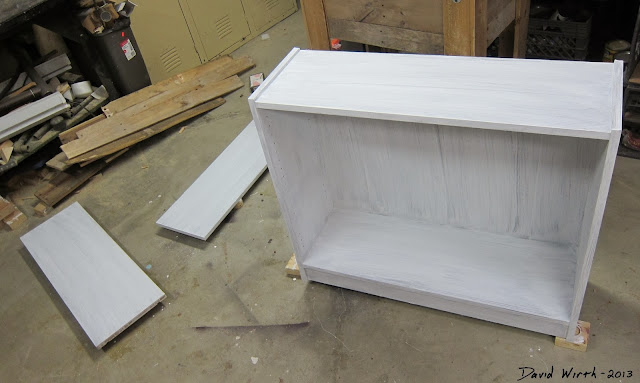
Then I painted everything white. It took a few coats since it wasn't real wood that these shells were made out of, but rather a laminate which was glued onto particleboard. The first few coats were kind of streaky, it was sort of like painting on plastic. Here's what one of the bookshelves looked like after the first coat. It wasn't good.
But after the second coat of white paint it was much better. Then i put on two coats of polyurethane, which gave it a shiny and very strong protective finish.
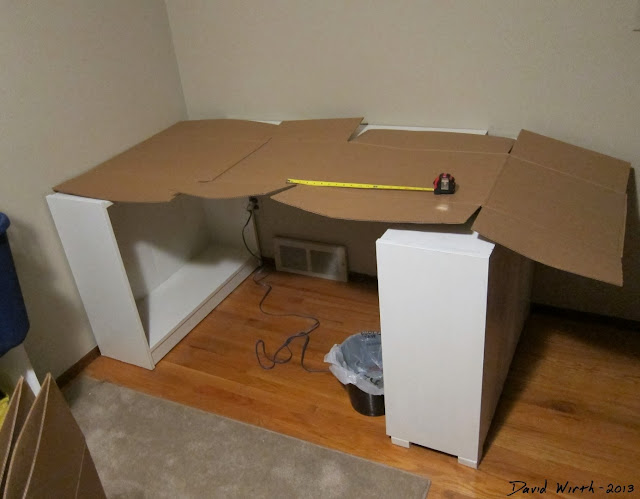
Next we had to decide what type of desk work top to use. So we put the bookshelves in place and tried to figure out a size using a measuring tape and a piece of cardboard.
We ended up deciding that the best thing to do would just be going to Lowe's and buying a piece of melamine. Melamine is a very dense particleboard with a hard white plastic coating on either side. It was actually very similar to the material that the shelves were made out of. Although it was much heavier and much stronger at 3/4". The only downside was that the 4x8 sheet cost $35. But since that was our only real expense for this entire project it wasn't too bad.
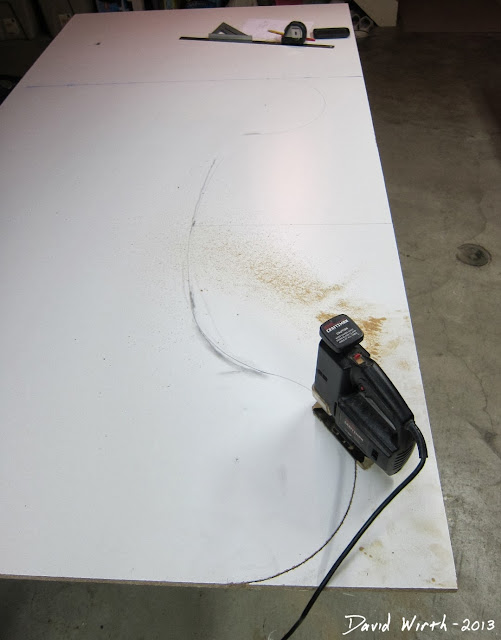
In order to get the most use out of the desk Karrie and I decided to not just keep the board square, but rather conform it to an "optimal shape". A shape that would have the most usable work surface, with everything on it easy to reach, and fit in a small space.
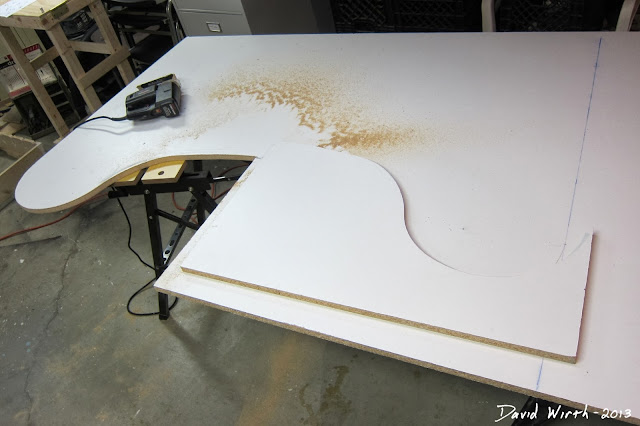
We decided that cutting the board to a length of 5' was the best size for the room. That meant I had to measure several times to find the center of the 5 foot section, then draw out several radius points before cutting everything out with the jigsaw. Here's half of the desktop cutout. You can sort of see that when Karrie sits in the middle she will able to reach much more surface area of the desk than if it were just a square board.
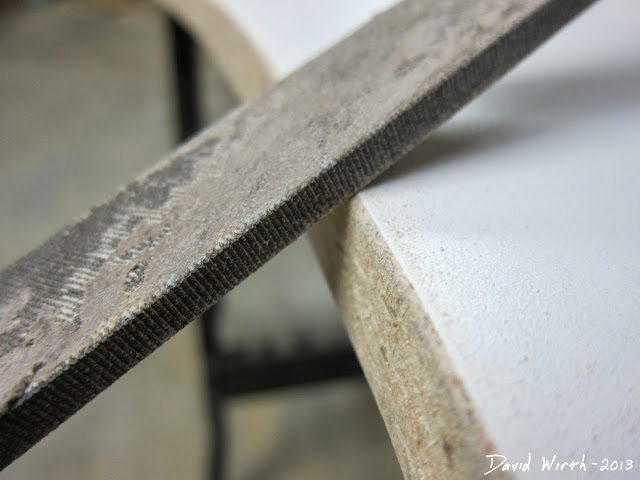
I then took a large wood rasp and rounded over all the edges. That way nothing would chip and it would be a smooth edge rather than a sharp corner.
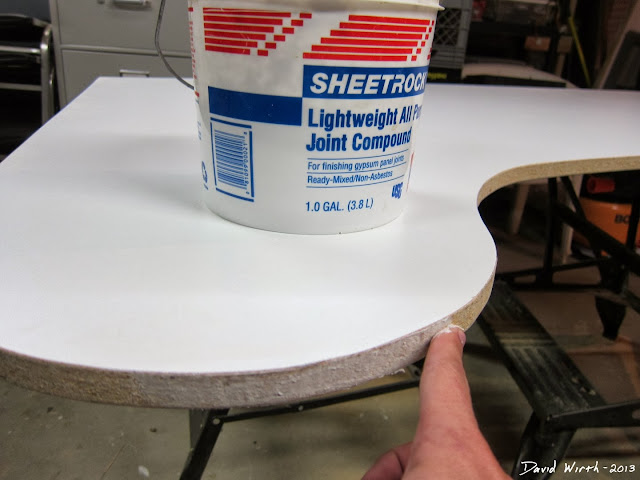
To make the cut edge look more finished I took some drywall joint compound and smeared that to all the exposed wood surface. I actually had to do about two or three coats, standing in between, before it got the smooth finish that I was hoping for.
The last thing I did was paint the edge with some more white paint and the arts and craft table was done. This was definitely the easiest part of the whole room. Although none of the three things I built where that difficult.
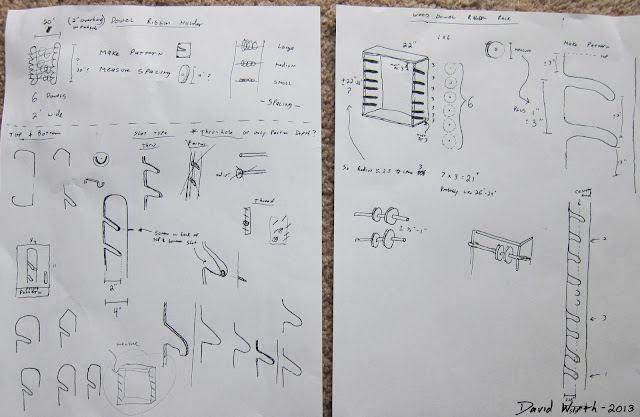
The last thing that Karrie had wanted was something to hold all of her ribbon spools. The obvious choice was a very simple ribbon rack which attach to the wall and easily held several spools, all at easy access. Here were some of my early drawings that I used before I started to build anything. I was mainly trying to figure out the angle of the cut-outs in the side boards.
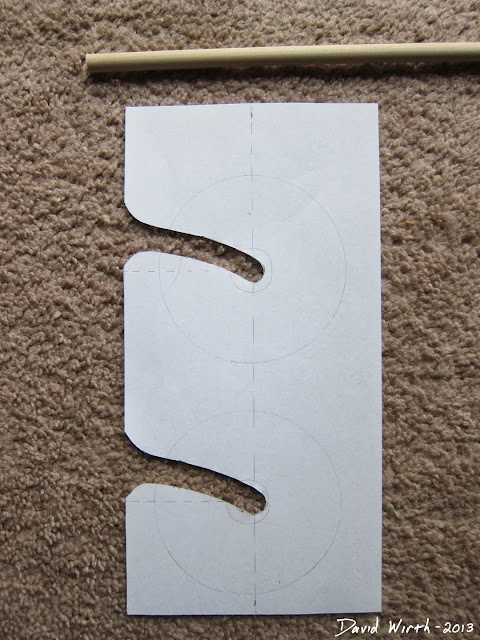
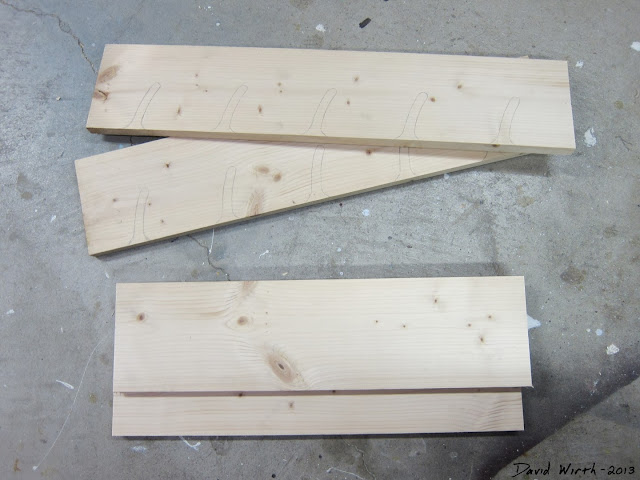
The first thing I did before building was to make a pattern. You can see from this picture that I used just an 8.5x11 sheet of white paper. On that I drew out two of the five slots that go on each side of the board.
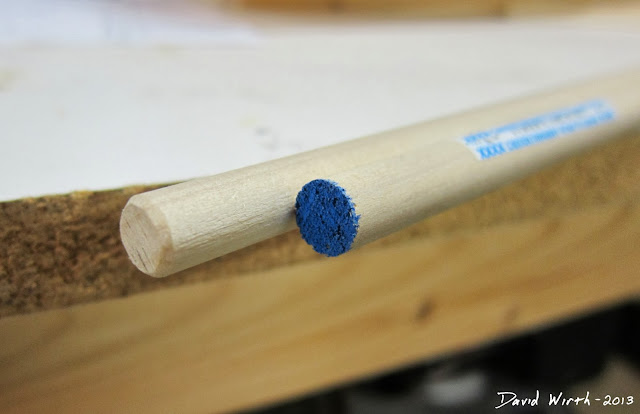
Earlier we bought three - 4' dowels which were 1/4" in diameter. We used that sized dowel because most of the ribbon spools holes were that size. Each dowel cost less than $1. I cut the 4' dowels in half and a rounded over the edges using the wood rasp.
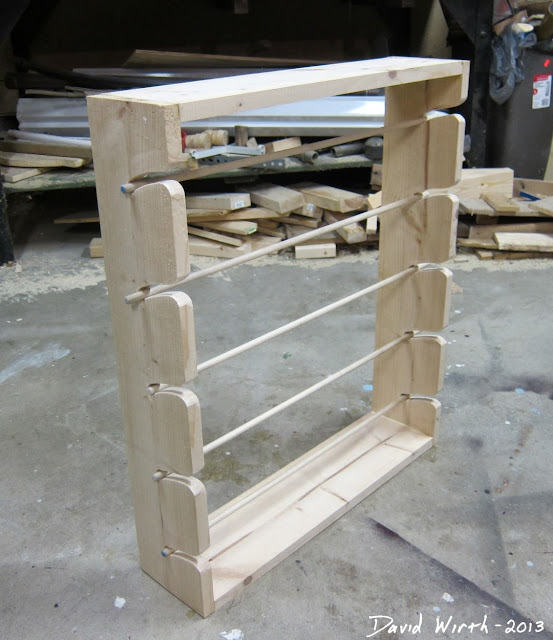
I had some scraps of pine 1x6 in my basement and that's what I used to make the ribbon rack box. It was real simple just a square box with slots cut out for the dowel.
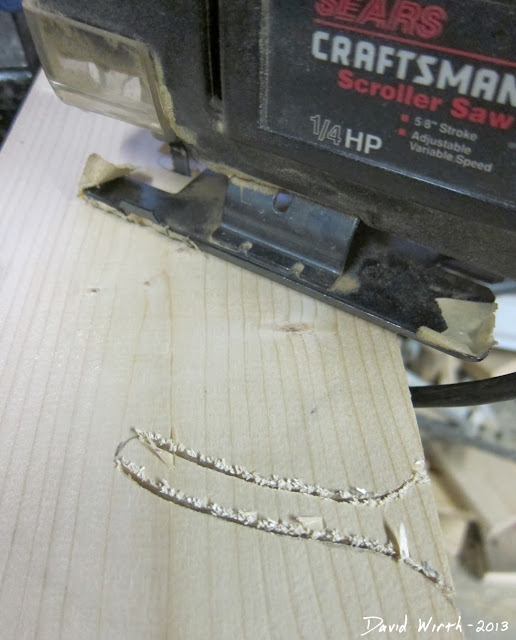
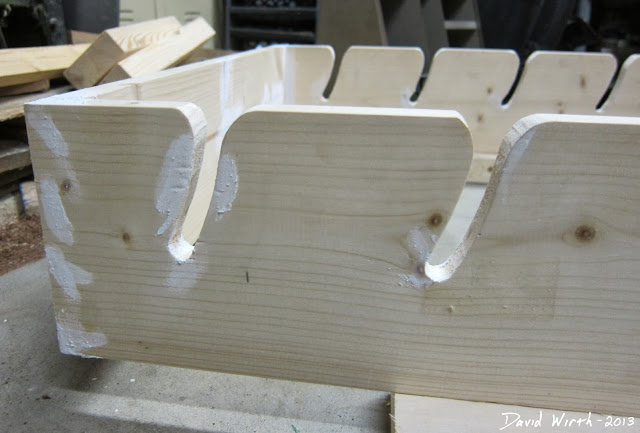
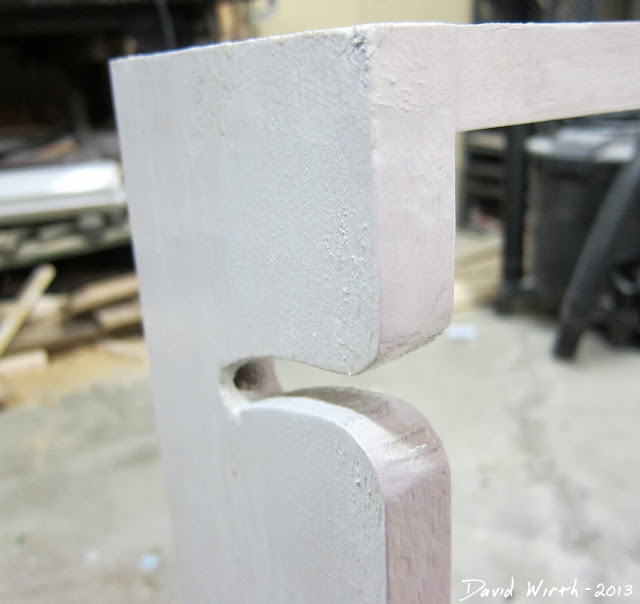
After using the pattern to trace out the five slots, I used the jigsaw to cut them out.
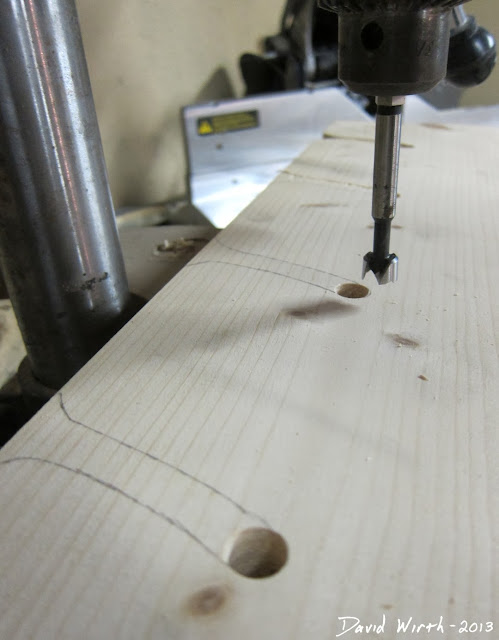
After trying to cut out the first slot I realized that with the large jigsaw blade it would be difficult to make the sharp 180° turn. So a quick shortcut i came up with was to use a drill bit and remove the end portion. That way I would only have to go toward the end of the slot and the piece would come out by itself.
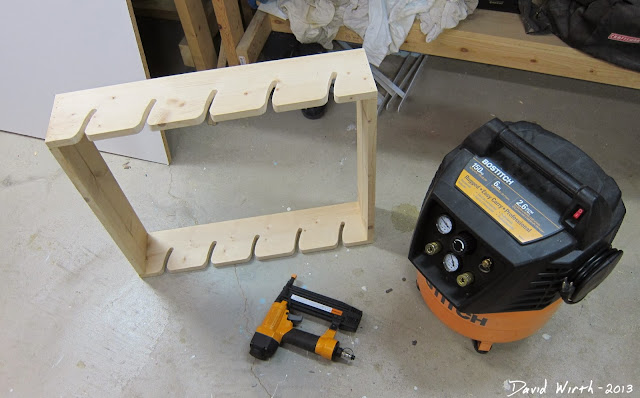
Here's what the ribbon rack looked like after I cut out all the slots then glued and nailed it together. I used my new nail gun and air compressor and it made for quick work. Yet again, another job that I can't imagine doing without my new nail gun.
Here it is standing up right with the dowels in place. At this point I was trying to figure how I would attach it to the wall once it was all done. I thought of using little metal brackets but I ended up coming up with an even simpler solution that was actually stronger. I'll show you how I attached it to the wall at the end.
I took some of that spackle I had and filled in all of the rough edges, nail holes, or gouges in the wood.
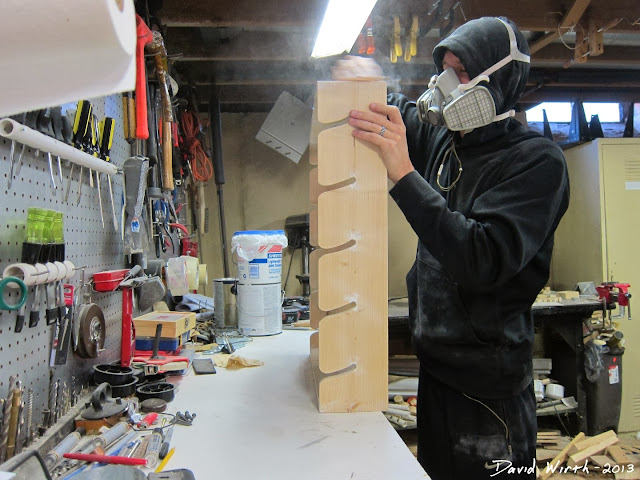
Then I sanded everything down with my vibrating sander. Also I sanded inside the cut outs of fine wood rasp. It was pretty dusty.
Here's a quick video i made while i was building the ribbon rack. I'm trying to do more video's in between taking pictures because i think it gives a better description of what i'm building. Although i'm terrible at explaining what i'm trying to do.
Ribbon Rack - How to Build Plans
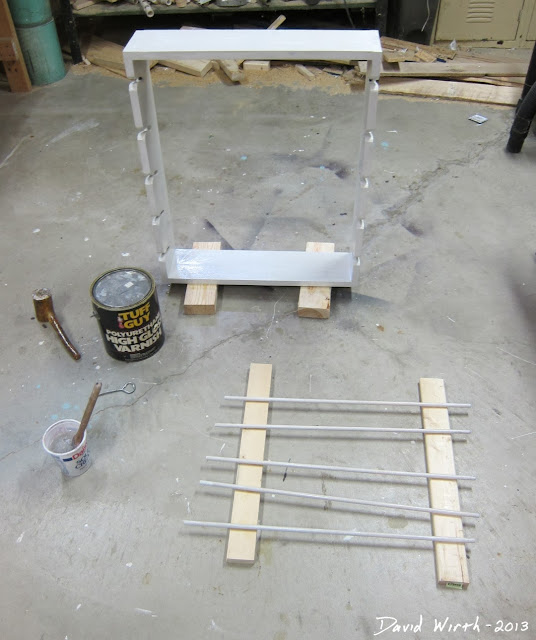
After it was all sanded I put two coats of white paint on it and then two coats of polyurethane. Just like I did for the bookshelves.
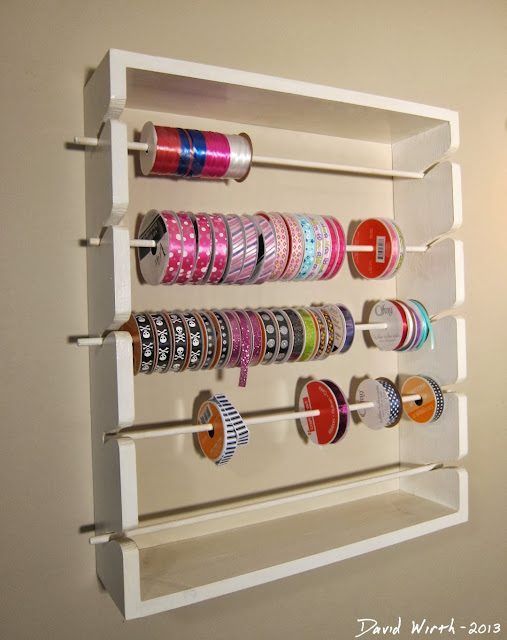
Here's the ribbon rack attached to the wall with some of the spools of ribbon on the dowels. You can see how all the different types of ribbon are easily accessible in this very simple design. You just lift the entire dowel off.
Now I said earlier I would explain how I attached it to the wall, so here's what I did. I drilled two holes through the back of the top cut out. The first hole, which i drilled from the front, was big enough for the screw head to be countersunk into the board. Then I drilled a through hole all the way to the back, just large enough for the thread portion of the screw. That way all it took was one screw to hold up the shelf. And the screw was not visible at all since it was countersunk halfway through the thickness of the board.
Next I attached the wooden box shelf of the wall. This was much heavier than the ribbon rack and I had to come up a different plan of how to attach it. I knew I wanted to attach it to the studs in the wall and not just screw into the drywall.
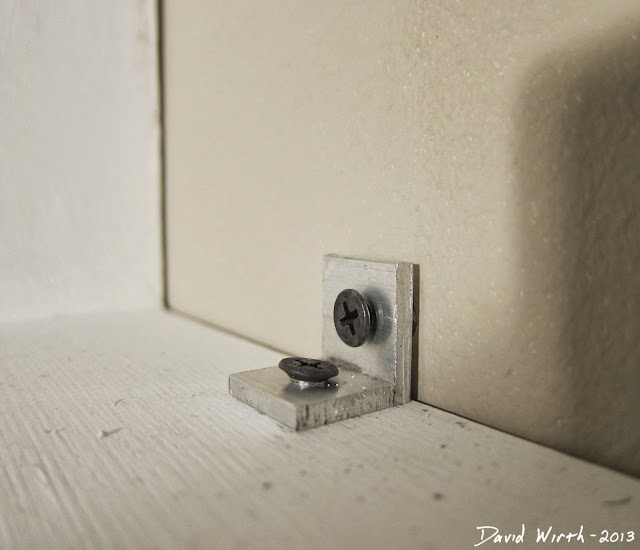
So this time I took some angled aluminum and cut out small brackets. I attached the brackets to the shelf at 16 inches on the left, center, and right of the top and bottom boards. I used six brackets in all. I attached them in a way that they would screw into the studs and that the shelf would be centered on the wall. It took a bit of measuring, and using the stud finder, but it wasn't too complicated. Then all I had to do was hold the shelf in place, making sure it was level, and screw the 2 inch drywall screws into the studs.
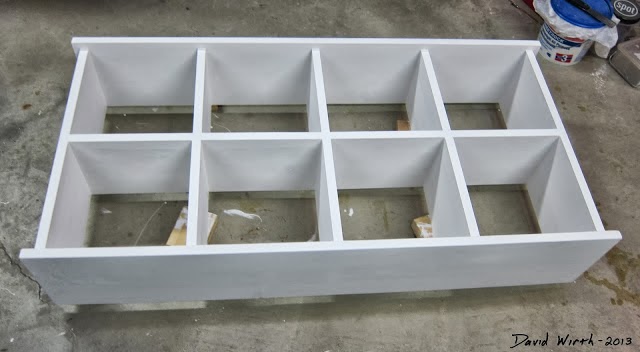
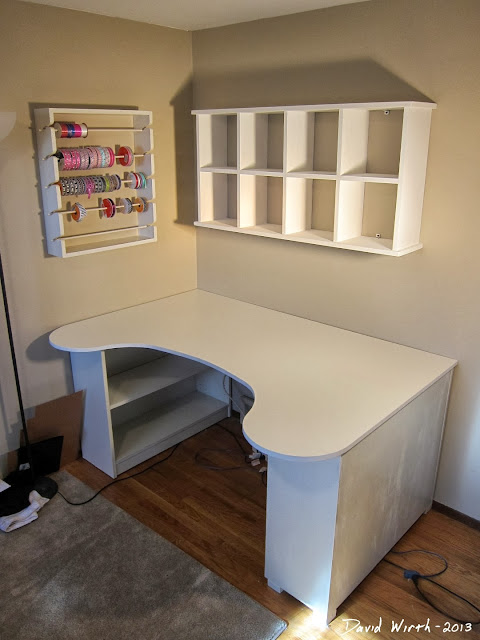
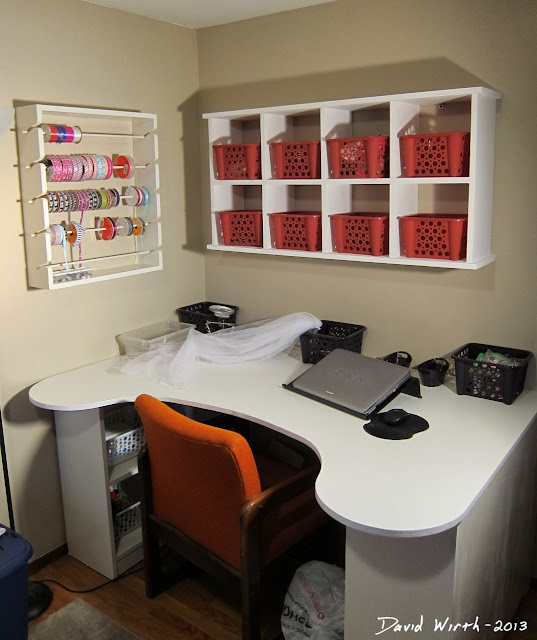
Here is what the finished arts and crafts room looked like. Everything seemed to match since the shelf, rack and table were all painted white. It didn't take up a lot of space, there was plenty of storage space for all the arts and crafts supplys.
And here's what it looks like with everything put in place. Karrie got the red baskets from the dollar store. We plan on getting a different chair, something a bit taller, but for now are using this old office chair.
The last thing she needs is a good light to brighten up any of the projects she is working on. It will have to be something that can move around and adjust its height when she's working on a small projects. But for now everything seems to work great.
.jpg)
.jpg)

 Home
Home
Post a Comment