Thursday, 5 April 2012
Simply put, a three dimensional picture can be made by combining two pictures from slightly different angles. The pictures should be parallel to each other and about your eyes width apart. Then combining them in such a way that your right eye sees the right picture and your left eye sees the left. Your brain will automatically visualize a three dimensional image.
This can be done with shaded picture colors and shaded glasses, polarized glasses, crossing your eyes and alternating images.
So i went out in the back yard and took some pictures of a flower, from about a foot away, moving the camera about 6" between each shot.
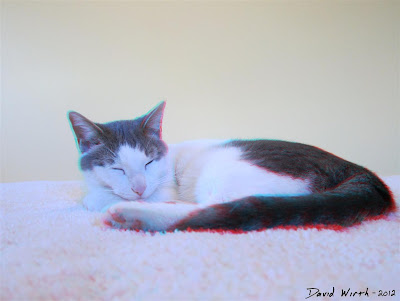
Anaglyph 3DI decided to try the Red/Cyan method for creating the 3D image. I was hoping to find those old paper glasses in a box in the basement, but when Karrie and i were at the Dollar Store i saw a pair and just bought them.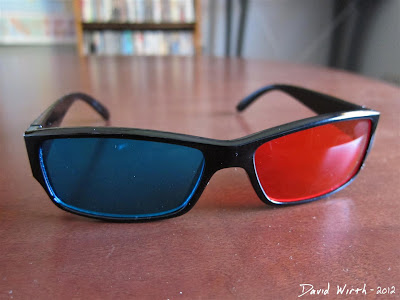
There are different ways of creating the final picture. You can combine the pictures in Adobe Photoshop. Making Two layers and Screening the first as Cyan and the second as Red, then merging them together. Or you can use one of many free programs online that do all the work for you. I used Anaglyph Maker, it was pretty easy, although there is some alignment and ghosting problems.
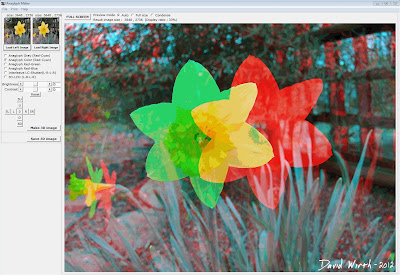
I also tried Stereo Photo Maker. It had basically the same features, was a little more complicated, but was more powerful and able to produce better 3D pictures. The same company created Stereo Movie Maker. Where you can combine 2 videos and make a 3D movie. I plan on trying that later.
When i tried to process the first pictures and make them 3D it didn't line up correctly. Here's the two pictures that i took.
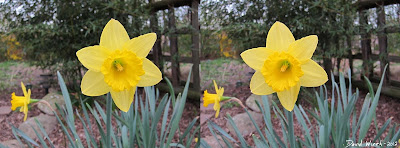
The red and cyan should only be slightly apart, as you can see the flower is way off.
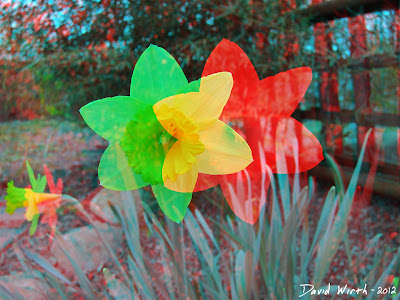
That's when i read that you need to vary the distance the camera moves depending on the distance to the object you are photographing. For example if you are very close to your subject, 1 foot away from a flower, just move the camera a few inches. But if you are photographing a building from a hundred feet away then you can move the camera 4"-6". I realized that i had moved the camera too much for how close i was to the flower.
So a few days later i went out in the front yard and took some pictures of my house, varying the distance i moved the camera. I tried moving 2", 4", 6" and 8". The two pictures below were the best of those shots. Both of them were when i only moved the camera 2". Even from this distance, when i moved the camera too much the images didn't line up as well.


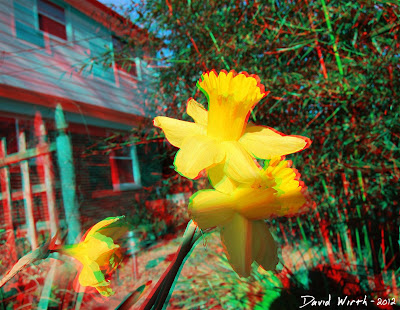
I then went to the backyard again and tried to take a picture of the same flower, this time not moving the camera as much, maybe an inch. It came out better but still not perfect. This time i could get the flower itself to appear as if it's coming out of the screen, but everything in the background did not line up. As you can see how far the two fence posts are apart.
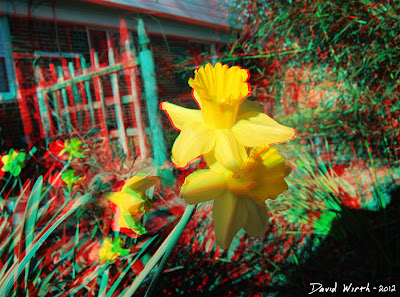
The same problem with the next picture. I could either get the background or foreground to align but not both together. I guess i could have used Photoshop and double processed the image where i aligned each part then combined them.
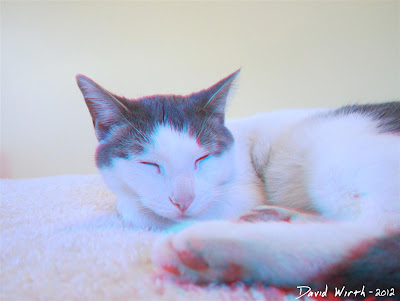
So i had to find something that would not move at all, and i found the perfect thing, Charlie.
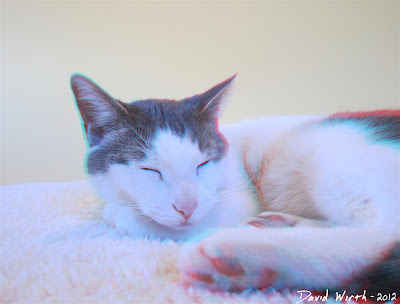
These pictures came out the best of all of them. It helped that it had a flat walled background.
Wiggle 3D
I was using the Rec/Cyan method for looking at the pictures but there are other ways to create the 3D effect. This is the "wiggle" gif method.
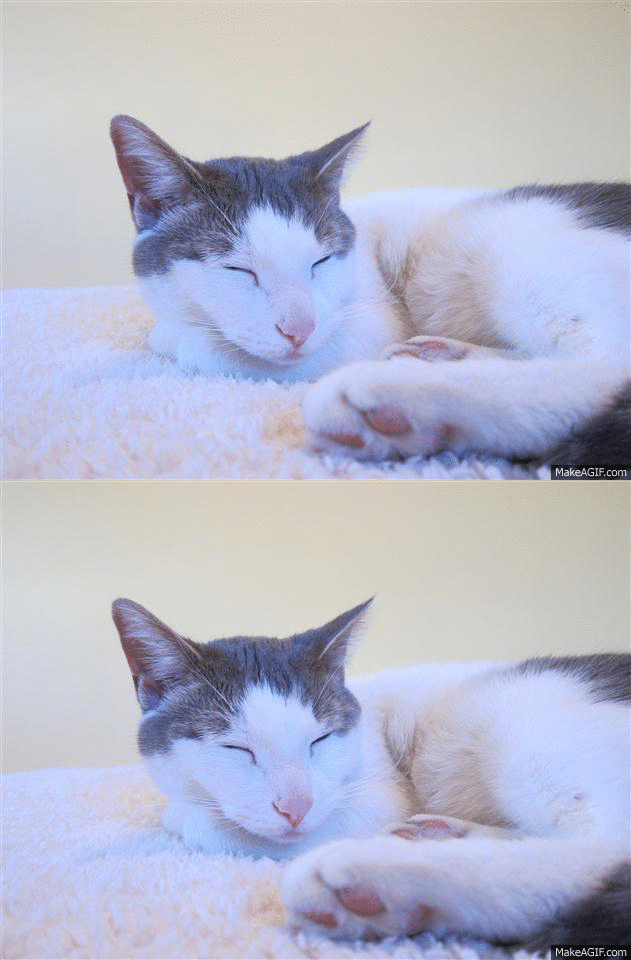
It's basically like 2 frames of a movie where your brain interprets the 3 dimensions.
Stereoscope 3D
There is the stereoscopic, side-by-side method, which puts the images on opposite sides of the corresponding eyes next to each other. Then you have to look at the picture cross-eyed and there should be the 3D image in the middle. When i first tried it, it hurt my eyes. But those weird "hidden image" posters that came out 10 years ago use this same method.
It should work but i'm not sure, i can't get my eyes to cross right.

PhotoFly 3D
Similar to the Wiggle gif method but it combines many pictures to create an actual 3D model of the area. It can be used as points in AutoCAD or to create videos like in the post i wrote about earlier.
Here's one of those videos.
This can be done with shaded picture colors and shaded glasses, polarized glasses, crossing your eyes and alternating images.
So i went out in the back yard and took some pictures of a flower, from about a foot away, moving the camera about 6" between each shot.
Anaglyph 3DI decided to try the Red/Cyan method for creating the 3D image. I was hoping to find those old paper glasses in a box in the basement, but when Karrie and i were at the Dollar Store i saw a pair and just bought them.


I also tried Stereo Photo Maker. It had basically the same features, was a little more complicated, but was more powerful and able to produce better 3D pictures. The same company created Stereo Movie Maker. Where you can combine 2 videos and make a 3D movie. I plan on trying that later.
When i tried to process the first pictures and make them 3D it didn't line up correctly. Here's the two pictures that i took.


That's when i read that you need to vary the distance the camera moves depending on the distance to the object you are photographing. For example if you are very close to your subject, 1 foot away from a flower, just move the camera a few inches. But if you are photographing a building from a hundred feet away then you can move the camera 4"-6". I realized that i had moved the camera too much for how close i was to the flower.
So a few days later i went out in the front yard and took some pictures of my house, varying the distance i moved the camera. I tried moving 2", 4", 6" and 8". The two pictures below were the best of those shots. Both of them were when i only moved the camera 2". Even from this distance, when i moved the camera too much the images didn't line up as well.


The same problem with the next picture. I could either get the background or foreground to align but not both together. I guess i could have used Photoshop and double processed the image where i aligned each part then combined them.

So i had to find something that would not move at all, and i found the perfect thing, Charlie.


Wiggle 3D
I was using the Rec/Cyan method for looking at the pictures but there are other ways to create the 3D effect. This is the "wiggle" gif method.

It's basically like 2 frames of a movie where your brain interprets the 3 dimensions.
Stereoscope 3D
There is the stereoscopic, side-by-side method, which puts the images on opposite sides of the corresponding eyes next to each other. Then you have to look at the picture cross-eyed and there should be the 3D image in the middle. When i first tried it, it hurt my eyes. But those weird "hidden image" posters that came out 10 years ago use this same method.
It should work but i'm not sure, i can't get my eyes to cross right.

PhotoFly 3D
Similar to the Wiggle gif method but it combines many pictures to create an actual 3D model of the area. It can be used as points in AutoCAD or to create videos like in the post i wrote about earlier.
Here's one of those videos.












 Home
Home